SSH stands for Secure SHell. It provides terminal or shell access to some remote computer.
SSH can be viewed as nothing more than a secure version of telnet. There are several SSH clients to choose from. Some are installed in the OIT labs, some you can install, and others require administrator privilege that you may not have under windows (at least in the labs).
Almost all UNIX distributions have ssh installed by default. Since Mac OS X is essentially BSD (another UNIX variant), just open up a command shell to get a UNIX shell. Simply type ssh username@linux.gl.umbc.edu to connect to one of the 3 linux servers available on GL.
Taurus[2]% ssh dhood2@linux.gl.umbc.edu
Warning: Server lies about size of server host key: actual size is 1023 bits vs. announced 1024.
Warning: This may be due to an old implementation of ssh.
dhood2@linux.gl.umbc.edu's password:
Last login: Fri Jan 30 14:21:56 2004 from linuxserver1.cs.umbc.edu
  UMBC Office of Information Technology              http://www.umbc.edu/oit
  --------------------------------------------------------------------------
  If you have any questions or problems regarding these systems, please
  send mail to "systems@umbc.edu", or call the OIT Helpdesk at 410-455-3838.

  ATTENTION:  Starting January 5, 2004, OIT will be eliminating support of
  the "elm" suite of mail applications, as well as mail reading via the
  standard UNIX "mail" and "Mail" utilities.  For more information about
  this change, please see:
  http://www.umbc.edu/oit/newsletter/fall2003.html#email

  If you are logged into an OIT lab machine, and using Linux is fine
  with you and want a fast processor all to yourself, consider booting
  your machine into "Linux" and work locally!

NOTICE:  Java has been upgraded to 1.4.2.

linux2[1]%
Tera Term Pro is what is installed on the computers that are in the OIT labs. It is also available on the free OIT CD. Tera is also freely available for download over the Internet at http://hp.vector.co.jp/authors/VA002416/teraterm.html. Please note that this is just the terminal emulator (i.e. just another telnet client), you will also need to download the TTSSH extension that adds the SSH secure functionality at http://www.zip.com.au/~roca/ttssh.html.
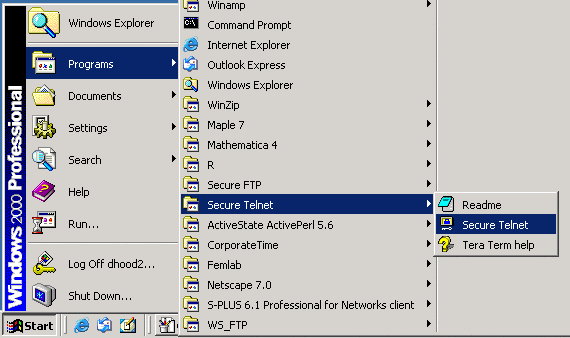
To connect to one of the UNIX servers using Tera Term (such as in one of the OIT labs) follow these directions...
1. Open up the Tera Term client
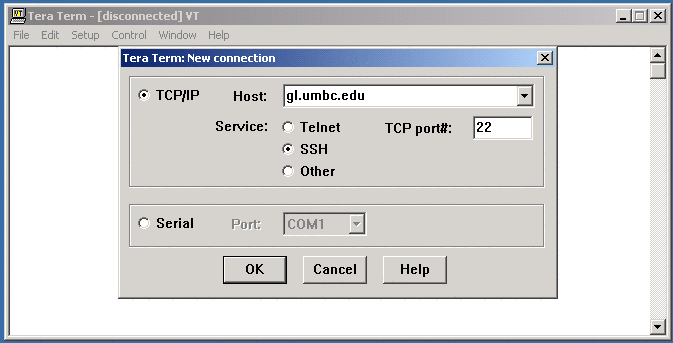
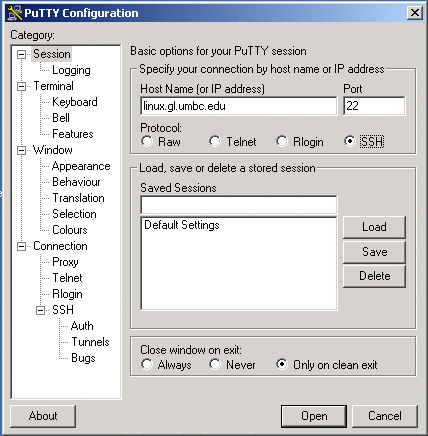
2. You will be presented with a screen like so. Make sure that you are connecting to the right server. Meaning if you want Linux, make sure you change the Host section to linux.gl.umbc.edu. Also make sure that the SSH button was selected. Once confirming this go ahead and click OK.
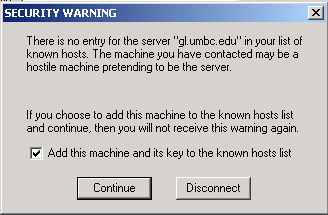
3. You may get a security warning the first time that you connect to a new host. You may also get this warning if the server needed to have some hardware replaced. Regardless go ahead and check the "Add this machine and its key to the known hosts list" check box. After confirming this go ahead and click on Continue.
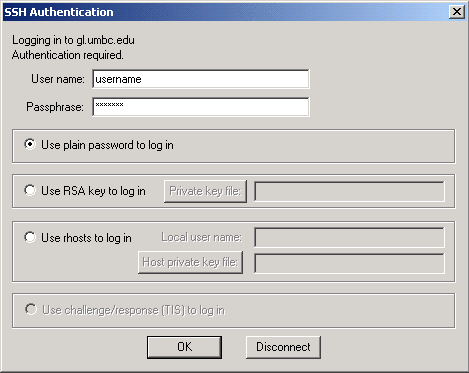
4. You will now be presented with the authentication window. Go ahead and enter your GL (also known as myUMBC) username and password. Then click on OK.
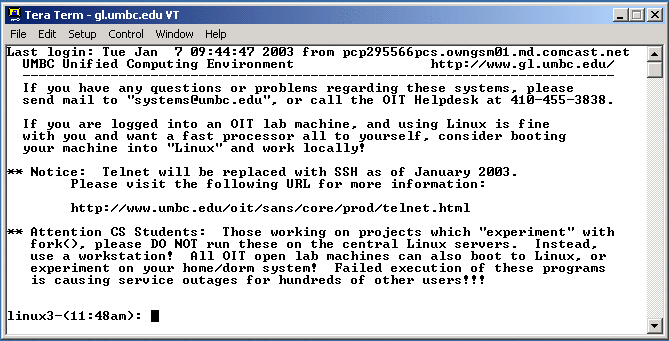
5. Finally you will be presented with a UNIX shell that looks a lot like the following. You can then issue commands at the prompt. When you are finished you can go ahead and type logout to close the terminal.
PuTTY is another SSH client, the one that I use and recommend for windows. It is freely available for download over the Internet. You can get PuTTY as a small stand alone executable (in case you can't install software into a given computer) or comes wrapped in a windows installer. http://www.chiark.greenend.org.uk/~sgtatham/putty/.
To connect to one of the UNIX servers using PuTTY, follow these directions...
1. Once you download the executable (or used the installer), all you need to do is to double click on the executable (or shortcut) to launch the program.

2. You will then be presented with the PuTTY configuration window where you can choose the host that you wish to connect to, as well as the protocol to use. Again, you want to make sure that you have chosen the SSH button. Once you have entered and confirmed this information click on the "Open" button.
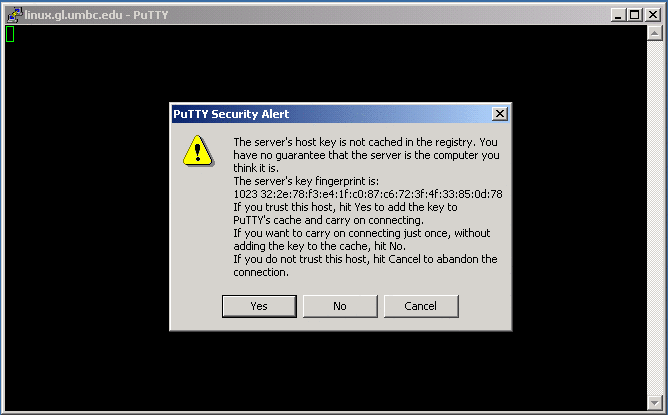
3. Again, you may be presented with a security alert window asking if you wish to accept the connection. Go ahead and click on "Yes".
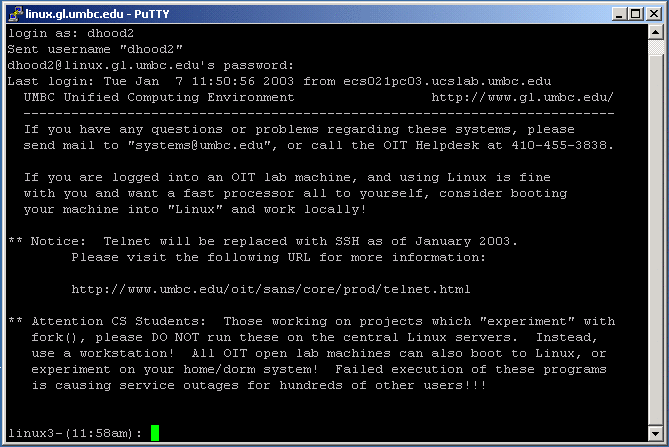
4. PuTTY then brings up a text based window, where you can enter your username (enter) and then your password (enter). You will then be presented with a shell that looks a lot like the following. You can then issue commands at the prompt. When you are finished you can go ahead and type logout to close the terminal.
There are also many other SSH clients out there. Some others include...